At Casetas de Jardín 24, we design our timber outbuildings for long-term durability and year-round usability. Properly insulating the roof and floor of your garden shed, log cabin, or summerhouse keeps damp at bay, helps manage condensation, and creates a comfortable indoor climate throughout both summer and winter.
This job adds roughly four to five hours to your standard cabin assembly. The roof is insulated using rigid foam insulation boards topped with OSB decking beneath the final roof covering, while the floor uses insulation boards fitted snugly between the foundation joists. In a standard 20 m² cabin, fitting just 30 mm of roof insulation reduces total building heat loss by 46%.
Here are the key principles before getting started:
Effective insulation requires understanding where heat actually escapes. As highlighted in our guide to thermally insulating a wooden cabin, an uninsulated 20 m² log cabin loses approximately 143 W/K: 79 W/K through the roof, 48 W/K through the timber walls, and 16 W/K through windows and doors. With a 15 °C temperature difference between inside and outside, that equates to roughly 2.1 kW of heat loss (excluding the floor, air infiltration, and thermal bridging).
Adding 30 mm of roof insulation cuts the roof’s U-value to roughly 0.6 W/m²K and drops overall building heat loss to 77 W/K. Because heat rises, the roof is always the top priority. The floor comes second, followed by the walls if they are under 70 mm thick or if you intend to heat the building continuously throughout winter. If you are still deciding on timber thickness, read our guide on choosing the ideal wall thickness.
The floor should not be neglected, however. Fitting 30 mm insulation boards delivers a floor U-value of roughly 0.59 W/m²K with 21 mm floorboards, or 0.57 W/m²K with 28 mm boards. In addition to reducing heat loss, underfloor insulation eliminates the uncomfortable chill of a cold floor underfoot.
If you plan to work, exercise, or relax in your cabin throughout the year, choosing a factory-insulated model saves both installation time and thermal guesswork. Our pre-insulated garden rooms come standard with 30 mm PIR boards in the roof and floor, alongside 100 mm of mineral wool in the walls.
Direct from the manufacturer with over 20 years of experience, a 5-year warranty, and free delivery.
Our factory-matched insulation kits provide all the components you need for a straightforward install. The roof kit includes rigid insulation boards, 12 mm OSB decking, and 50 mm timber screws. The floor kit supplies pressure-treated timber battens, fixings, and insulation boards. Note on board thickness: earlier documentation specified 25 mm boards, but our current kits supply 30 mm foil-faced PIR boards. Always check the exact specifications when ordering.
If you are a confident DIYer, you can source materials from local builders’ merchants. When comparing options, focus on thermal resistance (R = thickness ÷ thermal conductivity λ) rather than thickness alone. The table below outlines the thickness required for different materials to match the performance of 30 mm PIR (R ≈ 1.36 m²K/W):
| Material | Thermal Conductivity λ (W/mK) | Thickness for R ≈ 1.36 |
|---|---|---|
| Foil-faced PIR | 0.022 | 30 mm |
| Rock mineral wool | 0.035 | 48 mm |
| XPS (Extruded polystyrene) | 0.034–0.038 | 46–52 mm |
| Rigid wood fibre | 0.038 | 52 mm |
These figures reflect standard manufacturer specifications (such as IKO, Knauf Insulation, and Schneider Holz) alongside industry averages; always verify technical datasheets for your selected brand. Solid timber offers only modest insulating properties: an 18 mm spruce board (with cross-grain thermal conductivity of 0.10–0.12 W/mK) provides an R-value of just 0.15–0.18, which explains why uninsulated floors and ceilings lose heat so quickly.
Keep three practical points in mind:
Roof insulation is installed above the tongue-and-groove roof boards and beneath the outer waterproof covering, with OSB sheets providing a solid structural deck.
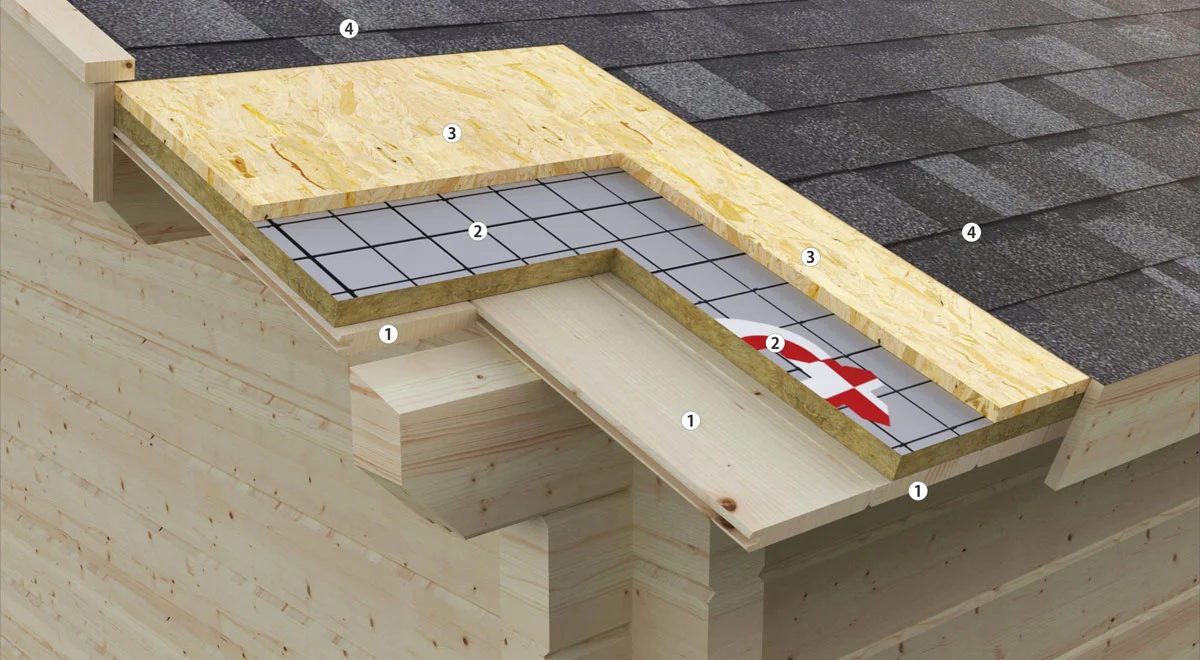
Installing insulation above the roof deck is technically superior to insulating from below. Building Science Corporation notes that placing continuous insulation above the timber substrate keeps the structural deck warm, drastically lowering the risk of interior moisture condensing on the timber. Because bituminous membranes and felts are vapour-impermeable, any moisture trapped inside the roof build-up cannot escape upwards. Taping board joints thoroughly and maintaining adequate room ventilation are both vital.
If you are retrofitting an existing building, strip off the old roofing material, follow the steps above, and finish with a fresh waterproof roof covering.
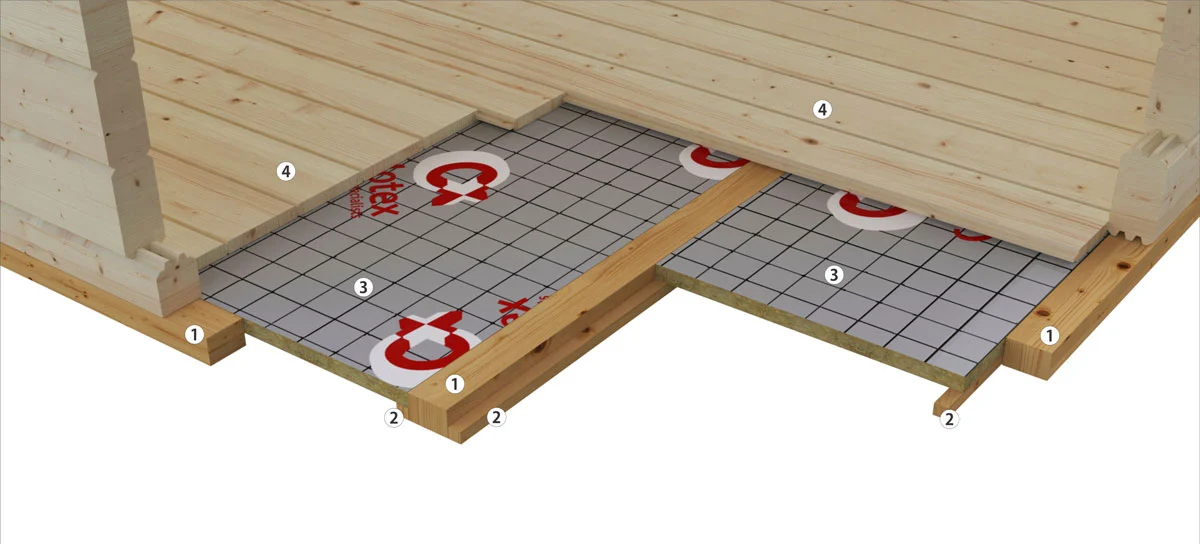
Gaps seriously undermine thermal performance. Historic England’s guidance on insulating suspended timber floors warns that voids between joists and insulation cause air leakage, thermal bypass, and cold-spot condensation. Seal any accidental gaps or edge cuts with expanding foam or aluminium foil tape. For a retrofit, lift the floorboards carefully, check that the joists are sound and dry, install the insulation, and replace the floor.
Underfloor ventilation is equally important. Irish building regulations (Technical Guidance Document C) recommend a minimum 150 mm ventilated void between the ground and the underside of suspended timber joists or insulation layers. While garden sheds fall outside statutory building control, this clearance prevents damp soil from transferring moisture to the timber framing. Laying a heavy-duty damp-proof membrane (DPM) over bare earth under the building provides valuable extra moisture protection.
Insulating both the roof and floor can comfortably be completed in four to five hours alongside standard cabin assembly, providing lasting comfort for minimal extra labour.
For an unheated tool shed or storage building, our standard 30 mm PIR kits offer plenty of thermal protection and condensation control. If you intend to use the cabin as a home office, gym, or hobby studio, national residential targets offer a useful reference. Spain’s Technical Building Code (CTE DB-HE), for example, sets maximum roof U-values between 0.55 W/m²K in mild climate zone α down to 0.33 W/m²K in colder zone E (with targets around 0.50 in zone A, 0.40 in zone C, and 0.35 in zone D).
With a U-value of approximately 0.6 W/m²K, our standard 30 mm roof kit approaches these residential standards. For higher thermal efficiency, use the formula R = thickness ÷ λ: achieving a U-value of 0.40 W/m²K requires around 50 mm of PIR, while reaching 0.33 W/m²K requires roughly 60 mm (calculated at λ = 0.022 W/mK, accounting for timber decking and surface resistance). If you intend to use your outbuilding as permanent living accommodation, consult our guide on regulations for wooden cabins and homes and verify local planning requirements.
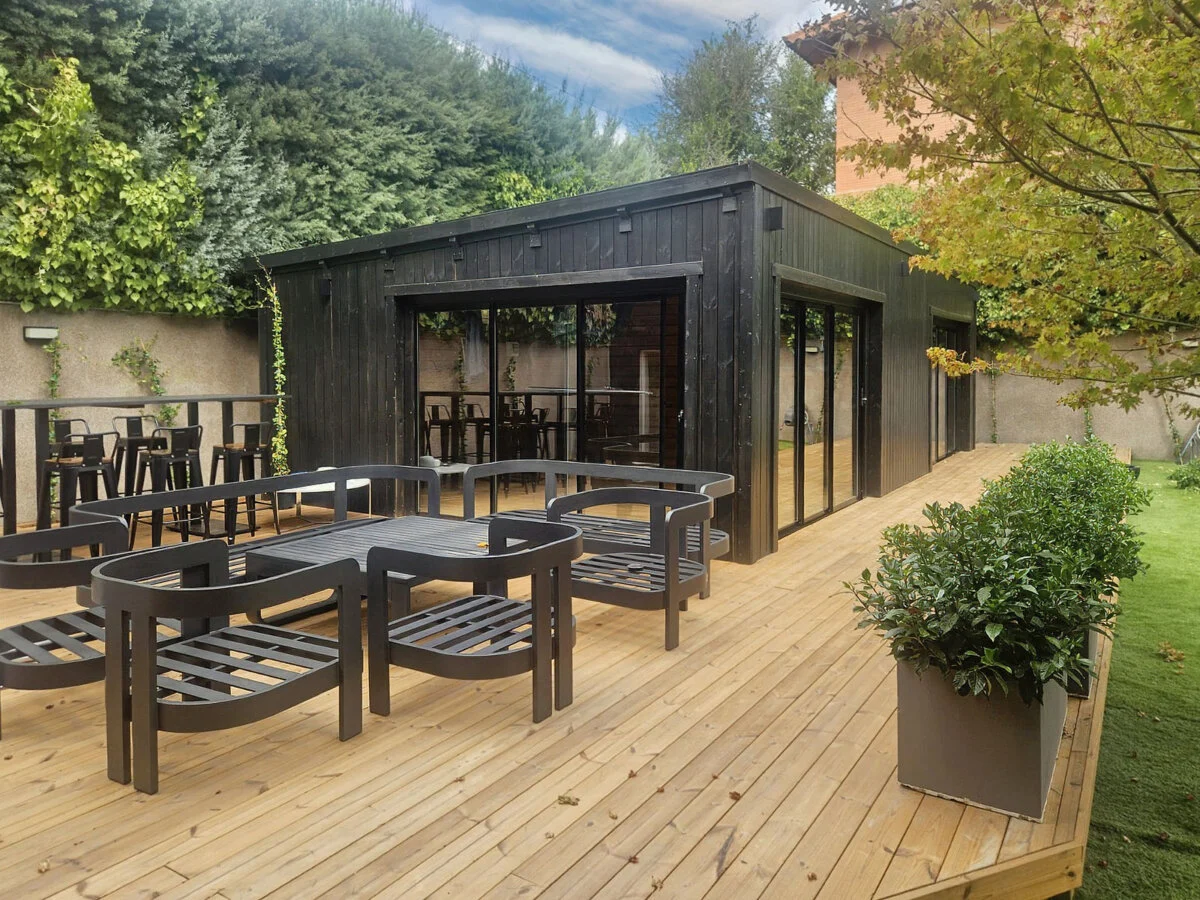
Adding high-performance insulation to an unventilated space can trap humidity and cause serious moisture problems. Avoid these common installation mistakes:
When is heavy insulation unnecessary? If your outbuilding is strictly used to store garden tools and mowers and will never be heated or cooled, insulation only serves to dampen summer heat peaks. In that case, adequate airflow is your primary defence against damp. Insulation delivers its real financial and comfort benefits when the space is heated and occupied regularly.
Roof and floor insulation kits are priced separately from the main building package, with costs depending on floor area. As of late 2026, kit prices include: €1,280 for the Lucas D garden shed (9 m²); €1,440 for the Jacob E (12 m²); and €2,410 for the Eamon log cabin (25 m² with 70 mm walls). Professional roof and floor insulation installation by our assembly team starts at €430 for models like the Lucas D and Jacob E. Check individual product pages for current pricing.
If taking on the installation yourself, allow four to five hours for the complete roof and floor process, and ensure you have an extra person to help lift and align the OSB roof decking sheets.
Our complete insulation kits include pre-sized rigid panels, OSB boards, and all required fixings tailored to your specific cabin model. Choose your building, add the matching insulation pack at checkout, and get everything delivered together with free delivery.
Precision-manufactured from slow-grown Nordic spruce, backed by a 5-year warranty.
By tackling the roof first, insulating the floor second, choosing the right thickness for your intended use, and maintaining good ventilation throughout, your timber outbuilding will stay comfortably cool in summer, pleasantly warm in winter, and protected from damp for decades to come.
Yes. For the roof, strip the existing roofing material, fit the insulation boards and OSB decking over the structural roof boards, and install a fresh waterproof covering. For the floor, lift the floorboards, check that the joists are clean and dry, fit the insulation snugly between them, and reinstall the timber flooring.
A 30 mm PIR layer achieves a roof U-value of roughly 0.6 W/m²K, which is ideal for workshops, storage, and general garden use. To approach residential efficiency standards (0.33–0.55 W/m²K, depending on your climate zone), use 50–60 mm of PIR. If using rock mineral wool, you will need approximately 48 mm to achieve the same performance as 30 mm PIR.
PIR (λ = 0.022 W/mK) delivers superior thermal resistance per millimetre of thickness and will not sag over time. Rock mineral wool (λ = 0.035 W/mK) requires a thicker layer and mechanical supports between joists, but it is vapour-permeable and non-combustible.