Having a level, firm, and stable base is one of the most important steps, if not the most crucial, when building a shed, outbuilding, or any other garden structure.
A proper base ensures stability, makes assembly easier, extends the shed’s lifespan, and helps maintain a neat, professional appearance. On the other hand, a poorly prepared base can lead to issues like wall panel separation, doors and windows that won’t close properly, uneven floors, and premature wear and tear.
Below, we take a closer look at the most popular types of bases for garden sheds, highlighting their main advantages and drawbacks. This should help you choose the right option for your soil type, shed size, and budget.
Important: To prepare your base and ensure your shed is suitable for its intended use, please request the shed plans by emailing info@casetasdejardin24.es .
Choosing the right base for your shed is just as important as selecting the perfect shed model. A good foundation means years of worry-free use.
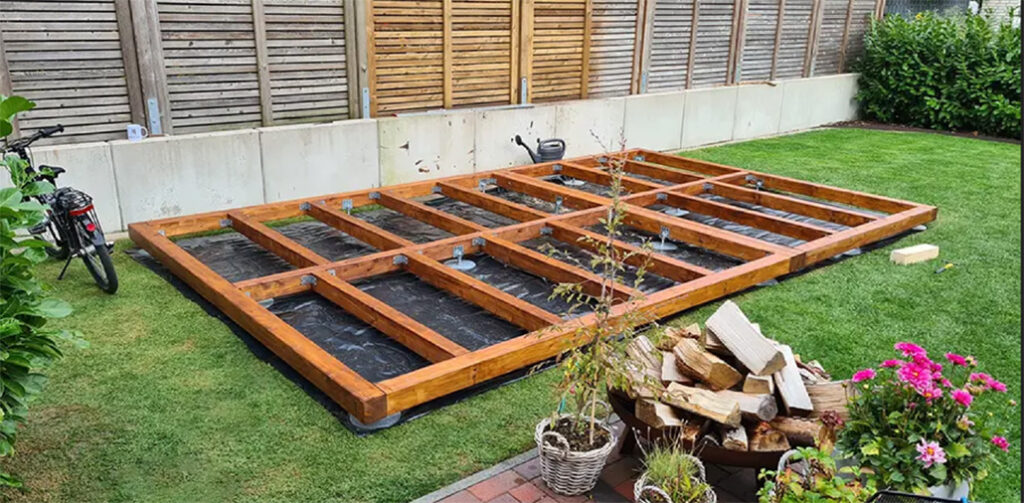
The adjustable support system provides an adjustment range of up to 20 cm, helping you achieve a perfectly level surface. No concrete or bricks are required, which means there’s no need for heavy machinery.
Garden Casetas 24 offers both the adjustable metal supports and the wooden beam framework, allowing you to assemble your shed directly on top. No additional substructure is necessary.
This base is more economical than a concrete slab and can be easily dismantled and transported if you ever decide to move the shed to another location.
It’s suitable for garden buildings up to 45 m² and is strong enough to support several times the shed’s total weight.
This system is also DIY-friendly – if you’re comfortable using a cordless screwdriver and spirit level, you can handle the installation yourself.
Ground screw anchors are another excellent option for creating a solid, level foundation. They’re quick to install, environmentally friendly, and suitable for almost any weather condition.
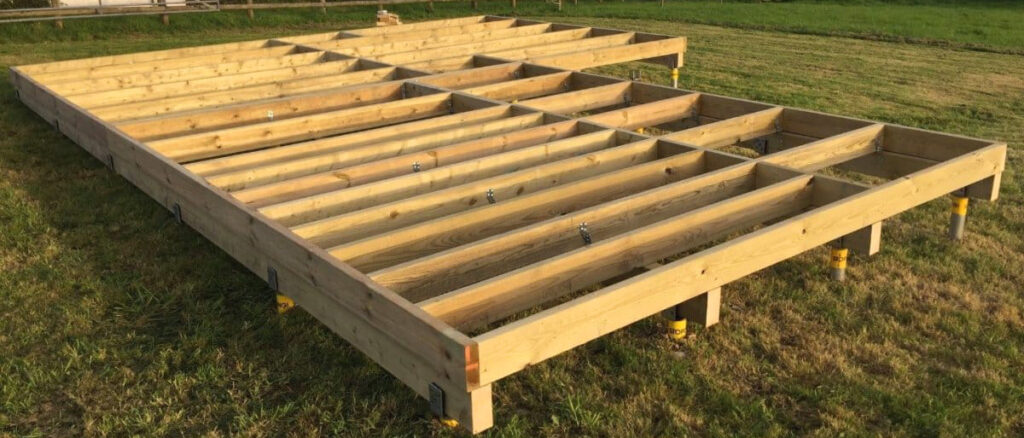
These anchors can be installed year-round and create minimal disruption to the surrounding area. No heavy concrete work is required, so there’s less mess and no need for cement bags or machinery rentals.
Most ground screw suppliers will provide recommendations based on your soil type and can also install the wooden base frame shown in the image above, ensuring a level surface for the shed’s floor beams.
When choosing this type of base, always refer to your shed’s floor beam plans to make sure there’s enough support. You can request these plans from info@casetasdejardin24.es.
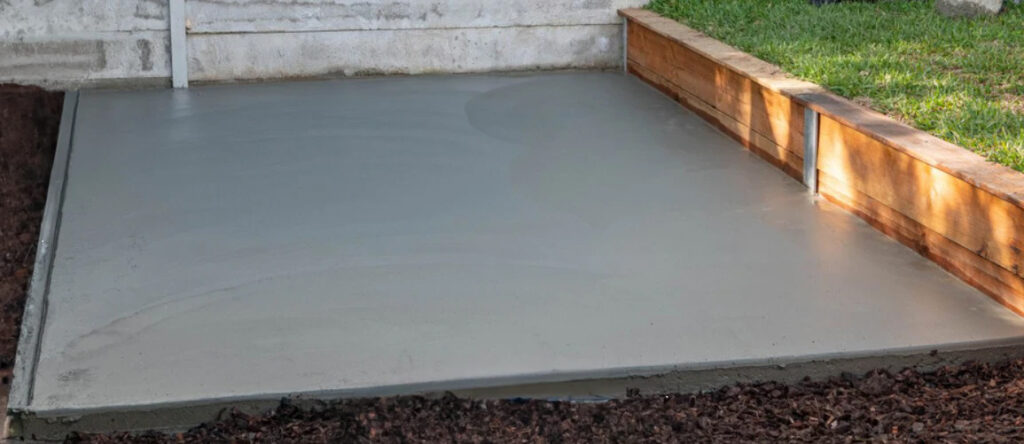
A concrete slab is the most durable and long-lasting option – and one that works well for everything from small sheds to large office-style garden buildings. However, it’s also one of the most expensive and labor-intensive bases to install.
If your shed will be close to fences, trees, or walls, leave at least 50 cm of space around it for roof overhangs and maintenance access. Mark the area and excavate to around 20 cm depth, following your shed plans. Add 5 cm to all sides to accommodate the wooden frame you’ll install later.
Fill the excavated space with 15 cm of gravel, level it with a rake, and compact it firmly using a roller or tamper.
Next, construct a wooden frame (or formwork) to contain the concrete. The top of the slab should sit about 4-5 cm above ground level to allow rainwater to drain away. The interior area of the wooden frame should match the shed plans and be perfectly level. Measure all four sides and compare diagonals; they should be equal. Level the frame using a spirit level.
Lay a waterproof membrane across the surface before pouring concrete.
For sheds larger than 10 m², we recommend to include steel reinforcement halfway through the slab. This will significantly increase strength and prevent cracking.
The next step in building a slab is pouring the concrete into the formwork. You can mix the concrete or purchase it pre-mixed. You’ll need a wheelbarrow, a shovel, a long piece of wood with a straight edge, and a helper. You’ll also need a cement mixer to mix the concrete.
Begin pouring the mix from one end to the other. Transport the concrete with the wheelbarrow, pour it evenly, and level it using the shovel and the long piece of wood. The concrete will take 2-3 hours to set on a warm day and 4 hours in colder weather. Remove the support posts and the wooden frame. It will take 3-4 days for the concrete to cure fully before starting shed assembly.
Pour the concrete evenly and level it with a straight-edged board. Allow 3–4 days for the slab to cure fully before starting shed assembly.
A strip foundation is a simpler and more economical alternative to a full concrete slab. It’s ideal for sheds of nearly any size, provided the ground is stable and not overly soft or sloped. It’s easy to remove if you decide to get a new garden shed in the future and the old foundation needs to be demolished.
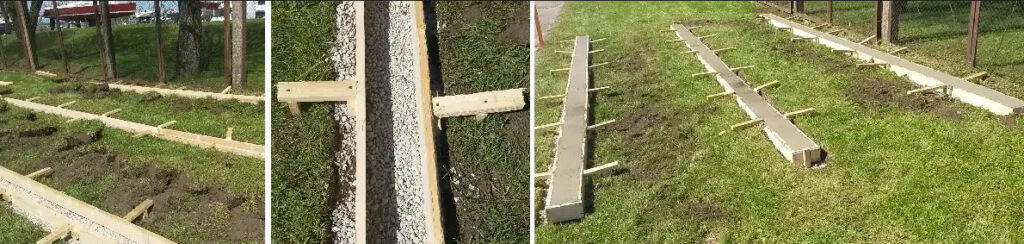
Mark out the strip locations according to your shed plans, ensuring they’re perpendicular to the floor beams and spaced 90-100 cm apart.
Now dig trenches around 15-20 cm deep and 15 cm wide, then fill them with gravel to improve drainage.
Build a wooden formwork extending about 5 cm above ground level to promote ventilation under the shed and prevent moisture build-up. Secure the wooden frames from the outside by driving posts into the ground and securing them to the wood. This will strengthen the wooden formwork and help support the weight of the concrete as it hardens.
Use steel reinforcement in the strips for extra strength, raising it 4-5 cm from the bottom so it sits at the center.
Pour and level the concrete. Compared to a slab foundation, a strip base requires several times less concrete; mixing it should be an easy task. You can also purchase ready-made concrete.
Begin pouring the concrete, starting from one end of the form and working toward the other. Pour the concrete and level it using the shovel and the piece of wood. The concrete will take a few hours to set on a warm day and 4–5 hours in colder weather.
You’ll need a concrete mixer, a wheelbarrow to transport the concrete to the construction site, a shovel, and a 20–25 cm piece of wood with a straight edge.
Once set, remove the formwork and clean out the soil between the strips (approximately 5 cm). Cover with a waterproof membrane or geotextile and finish with gravel or sand to discourage weed and grass growth, which can lead to rot.
Remove the support posts and the wooden frame. Allow 2-3 days of curing before assembling the shed.
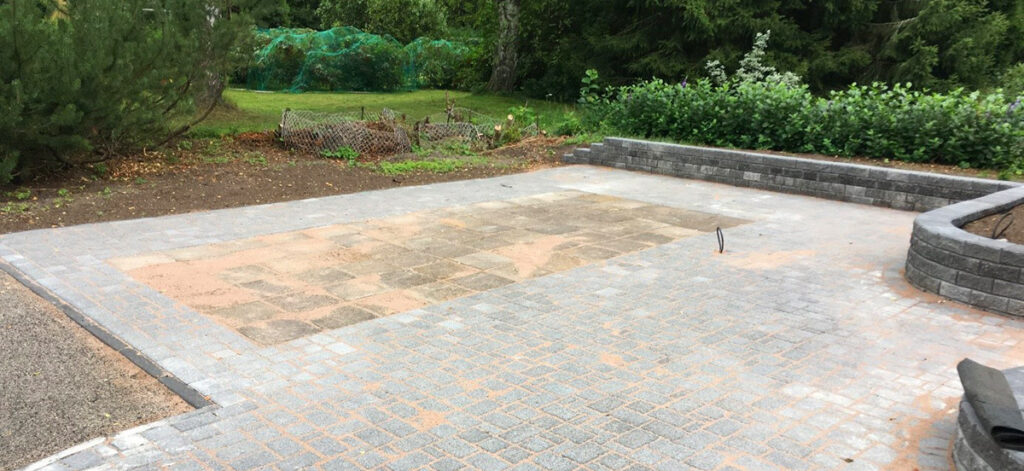
Paving slabs are a practical and attractive option for small to medium-sized sheds. They’re easy to install, affordable, and require no concrete mixing. Another bonus is that it’s also easy to remove or expand in the future if you desire to build a larger shed.
Excavate to a depth of about 15-18 cm and extend the area 10-15 cm beyond the shed’s footprint for better drainage.
Cover the surface with a waterproof membrane, add 15 cm of gravel, rake it to level the surface and compact with a tamper.
Spread 3 cm of sand over the gravel, level it out, and begin laying the slabs with 3 mm gaps between them.
Tap gently to level and finish by sweeping sand into the joints until compact.
This base type offers a clean, finished look and is simple to adjust or extend later if you decide to upgrade your shed.
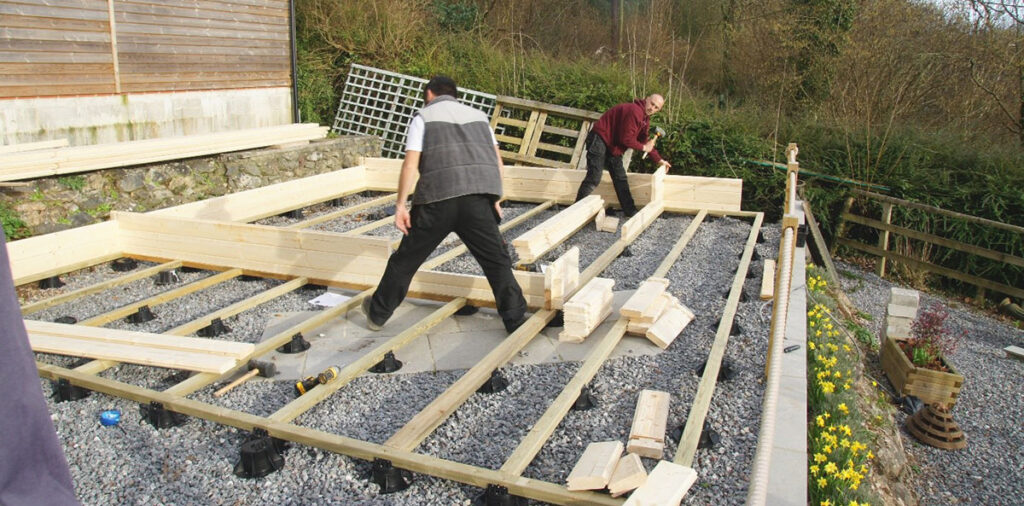
Start by calculating how many supports you’ll need based on your shed’s base plans. Pads cost around €3 each, or you can use concrete blocks placed on a gravel bed.
Excavate to a 20 cm depth and an additional 10 cm around the shed to create an additional area of dry ground.
Put up a barrier on the interior sides of the excavated area using wooden planks. It will help you place the gravel, and once leveled, it will keep the gravel base in place.
Cover the bottom with a membrane to prevent grass from growing under the shed. Fill with gravel and level it with a rake. The next step is to compact the soil to ensure it won’t shift over time.
Then position the supports or blocks so that the distance between them doesn’t exceed 50-60 cm. Place the supports for all base beams, both exterior and interior.
First, bolt the entire base frame together according to the shed plans, raise it onto the supports, level it by adjusting the height of the supports, and bolt the beams to the supports.
If you’re using concrete blocks, first lay the blocks, then screw the entire base frame together. Next, level, and finally screw the exterior beams to the blocks.
Every type of garden shed base has its advantages. Concrete offers unbeatable durability but comes with higher costs and more effort. Adjustable supports and screw anchor systems, on the other hand, are quicker, cleaner, and more flexible – especially if you ever plan to move your shed.
Whatever option you choose, remember that a well-built base is the foundation of a long-lasting and trouble-free shed. Take your time with this stage – you’ll thank yourself later.
