When insulating a log cabin or timber building, your order of operations matters: start with the roof, move to the floor, and address the walls if the timber is under 70 mm thick or if you intend to live in it year-round. In a typical 20 m² cabin, insulating the roof alone slashes heat loss by 46%—and doing both the roof and floor takes just four to five hours.
Spruce offers far better natural insulation than masonry, but timber alone cannot do all the heavy lifting. Its thermal conductivity sits at roughly 0.13 W/m·K (according to the Thermtest database), compared to 1.6 W/m·K for standard concrete and 0.033–0.040 W/m·K for mineral wool. A solid 70 mm timber wall delivers a thermal resistance (R-value) of about 0.54 m²K/W. Data from Calculytic indicates that windows account for 25% to 35% of transmission heat loss, while uninsulated roofs represent 15% to 25%.
To see the real-world impact, consider a 5 × 4 m cabin with 34 m² of net wall area, 22 m² of roof area, and 6 m² of standard double glazing (U = 2.7 W/m²K). Excluding floor transmission, air infiltration, and thermal bridges, the figures speak for themselves:
This is why glazing specifications matter. According to Open University research, upgrading standard double glazing to low-emissivity (low-E) glass drops the unit’s U-value from 2.7 down to between 1.7 and 2.0 W/m²K.
Skip the retrofitting by choosing a factory-insulated model. These buildings arrive ready for year-round living, equipped with 30 mm PIR floor and roof boards and 100 mm wall insulation—with installation included.
Direct from the manufacturer with 20+ years of experience and a 5-year warranty.
Standard log cabins are traditionally designed for seasonal use, but a modest insulation upgrade easily transforms them into comfortable spaces year-round. Fitting insulation during initial construction is substantially faster, easier, and cheaper than retrofitting it down the road.
Our cabin thermal insulation kit is designed for straightforward assembly and includes all the necessary materials and fixings to insulate both the roof and the floor. The roof boards install directly over the tongue-and-groove roof planks, followed by an OSB deck that receives bitumen shingles, roofing felt, or an alternative waterproofing system. You can add these finishes directly to your order or source them locally; check each cabin’s product page for available options.
Insulating both the roof and the floor enables true four-season comfort. Combined with a small air-source heat pump, the building will remain effortlessly warm through freezing winters and pleasantly cool on scorching summer afternoons. By blocking intense solar radiation from baking the roof, the insulation works just as hard in July as it does in January.
The rigid foam boards feature a low-emissivity aluminium facing, eliminating thermal bridging and maximising heat retention to keep running costs to an absolute minimum.
The roof kit includes 30 mm rigid insulation boards and 11 mm OSB panels (always consult your model’s specific product sheet for dimensions). Lay the insulation boards directly onto the timber roof boards, working upwards from the eaves. Cover the full roof surface, trimming the ridge boards flush and leaving no gaps between panels.
Next, place the OSB panels over the insulation and screw them down, inserting one screw in each corner and one in the centre of every panel. Finally, apply your chosen waterproof roof covering. We recommend self-adhesive Icopal bitumen shingles for pitched roofs, or heavy-duty self-adhesive Firesmart roofing felt for pent and flat roofs.
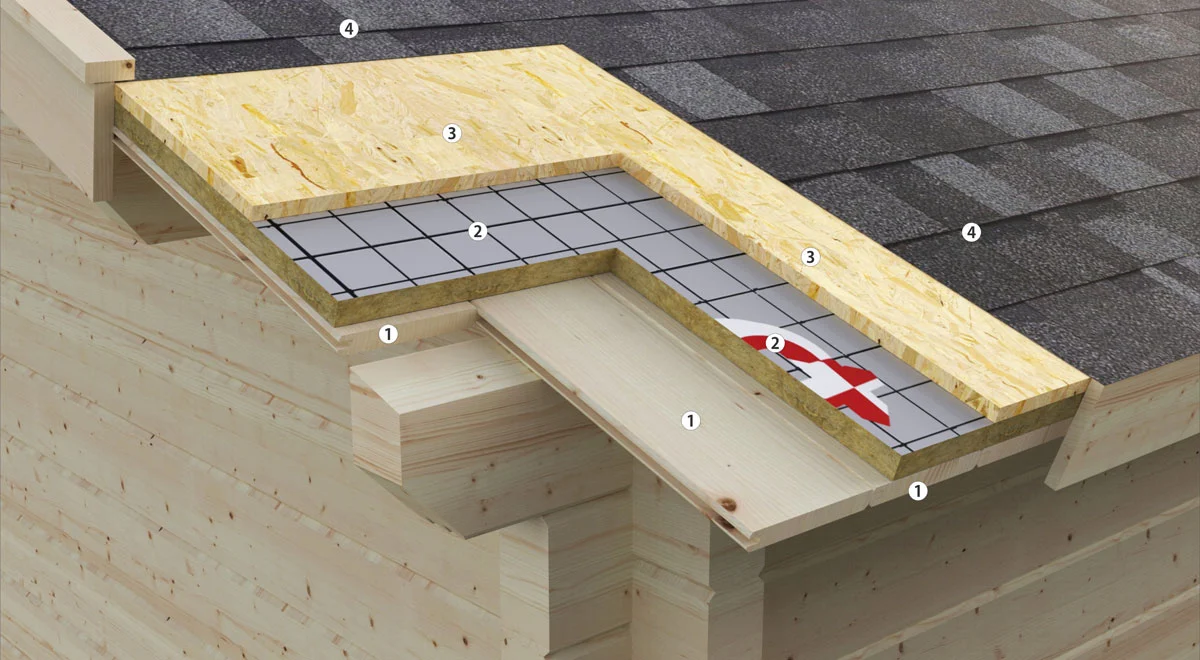
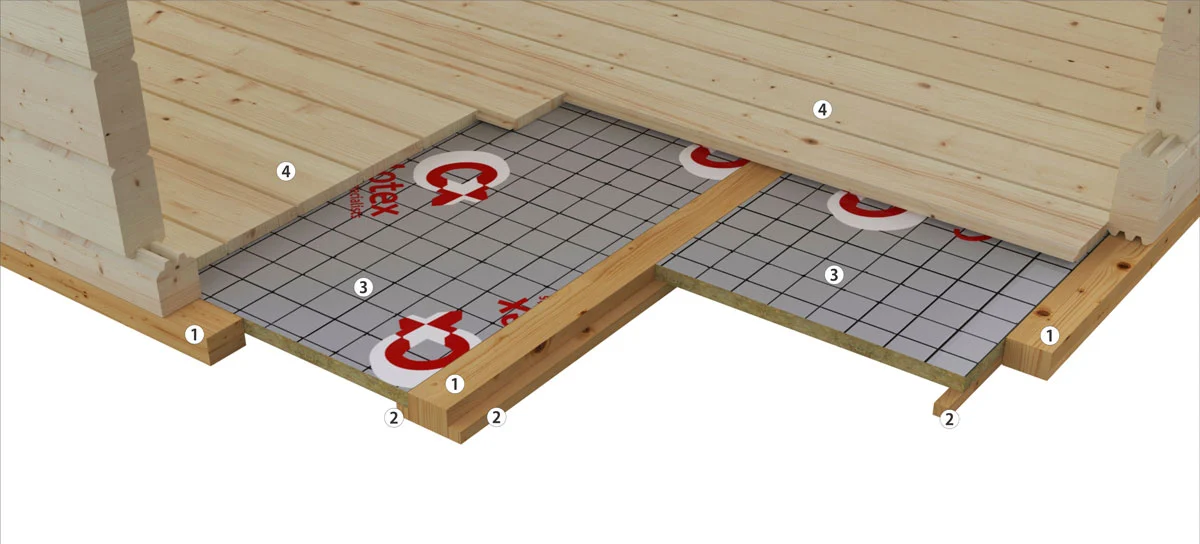
The floor kit uses 30 mm rigid insulation panels supported by screws or metal brackets set inside the foundation joists. First, drive screws or attach small L-brackets along the inner faces of the joists, roughly 30 mm below the top edge. Cut the insulation boards to size so they wedge snugly between the joists, rest them on your supports, and then lay the timber floorboards on top.
Place support screws every 30 cm along both sides of each joist. The insulation should sit tightly by friction alone; the screws simply act as stops to prevent the boards from dropping under floor loads over time.
Insulating the floor and roof on a building of 20 m² or more takes approximately four to five hours, depending on roof geometry. For year-round use, it is one of the most cost-effective upgrades you can make. For step-by-step guidance, consult our in-depth walkthrough on how to insulate your cabin’s roof and floor.
Wall insulation requirements come down to log thickness and how you plan to use the space. Basic tool sheds typically use 19 mm to 28 mm timber, whereas habitable spaces—such as home offices, guest rooms, or annexes—demand wall thicknesses between 40 mm and 92 mm. A 44 mm wall is generally sufficient for comfortable three-season use once the roof and floor are insulated.
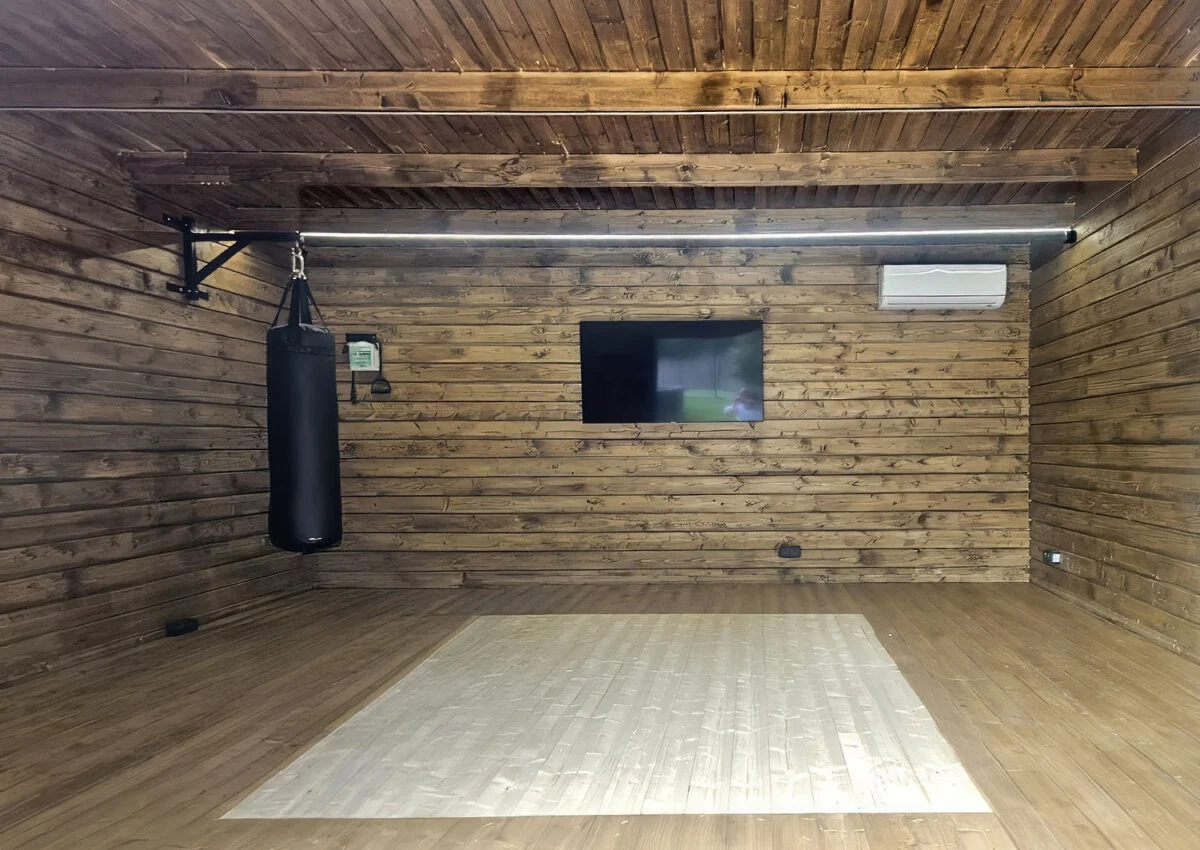
However, if you plan to live year-round in a wooden house built with 70 mm or 88 mm logs, exterior wall insulation is well worth the investment. In a recent golf simulator studio we installed in Madrid, the client specified 100 mm of mineral wool clad in external timber rainscreen panels. To fit this setup yourself, explore our dedicated wall insulation kit.
Avoid thick internal insulation. Studies on solid log construction advise against installing more than 50 mm of mineral wool internally, and they recommend that timber moisture content stay below 12% before installation. Adding insulation externally behind a ventilated cavity keeps the solid logs warm and dry on the building’s interior, eliminating interstitial condensation risks.
As an architectural benchmark, the Spanish Technical Building Code (CTE) sets maximum thermal transmittance values in climate zone C at 0.49 W/m²K for exterior walls and 0.40 W/m²K for roofs. While freestanding garden outbuildings are generally exempt from mandatory CTE standards, a log wall upgraded with 100 mm of mineral wool (≈ 0.28 W/m²K) easily surpasses this benchmark, whereas a roof with just 30 mm of insulation (≈ 0.6 W/m²K) falls short. If you are building a permanent dwelling, consider increasing roof insulation thickness accordingly. Before breaking ground, review our complete guide to regulations for installing a wooden house.
Thermal insulation is just as vital during summer heatwaves. According to IDAE (Spain’s Institute for Energy Diversification and Saving), external shading systems like awnings, louvres, or exterior blinds stop up to 80% of solar radiation before it hits the glass—something standard interior blinds simply cannot do. Make sure to ventilate cross-drafts during the cooler hours of dawn and dusk.
Roof colour also plays a major role: research conducted by UNED on residential flat roofs in Cádiz demonstrated that replacing a dark membrane with a reflective white “cool roof” lowered cooling energy consumption by 19%.
Built with 70 mm or 88 mm timber profiles and fully insulated envelopes, our wooden houses maintain comfortable temperatures year-round with minimal heating costs. Crafted from slow-grown Nordic spruce with premium double glazing throughout.
Direct from the manufacturer: no dealer markups and free delivery included.
Research from the Building Science Corporation highlights that timber develops surface mould once its moisture content surpasses 16%. Insulation cannot fix a damp substructure, so keep these critical installation pitfalls in mind:
Once your cabin is assembled and insulated, treat all exterior timber surfaces—along with the interior faces of door frames and window reveals—with a high-grade microporous wood preservative. Pay close attention to the top and bottom edges of door leaves and opening window sashes.
Keep in mind that heavily insulating a 19 mm to 28 mm storage shed used only for gardening gear rarely makes financial sense. For occasional summer retreats, natural ventilation and external shading are often all you need.
Ultimately, successful insulation begins where heat escapes fastest: address the roof first, followed by windows, walls, and floors, while maintaining an airtight, moisture-controlled building envelope.
Yes, though insulating during the initial build is far easier and more economical. Retrofitting takes considerably more time, whereas doing it during assembly takes just four to five hours for both the roof and floor on a 20 m² building.
If the building will serve as a daily home office, creative studio, or residential annexe, external wall insulation is highly recommended—solid 70 mm spruce provides an R-value of roughly 0.54 m²K/W on its own. For extended three-season use, an insulated roof and floor are usually sufficient.