In this guide, we walk you through one of the simplest, fastest, and most cost-effective ways to run power, lighting, and sockets to a timber garden shed. Whether you are creating a garden office, a summer house, an art studio, or a backyard gym, the setup follows the same core process: a dedicated supply line from the main consumer unit in the house, a separate lighting circuit, a dedicated socket circuit, and sign-off by a certified electrician.
To illustrate how this works in practice, we look at a real-world 30 m² shed fitted with 8 lighting points and 12 power sockets. All materials cost under €500, and a licensed electrician completed the interior wiring and connections in a single day.
| Stage | What Is Installed | Key Specification |
|---|---|---|
| Supply line from house | Wall-mounted or buried underground in conduit | Underground: minimum depth of 0.60 m |
| Circuit protection | Miniature circuit breakers (MCBs) and 30 mA RCD | Protects each circuit individually |
| Lighting circuit | 3 × 1.5 mm² cable | Up to 30 lighting points per circuit |
| Socket circuit | 3 × 2.5 mm² cable | Up to 20 power outlets per circuit |
| Commissioning | Electrical Installation Certificate (CIE) | Issued and signed by the certified installer |
Under the Spanish Low-Voltage Electrotechnical Regulations (REBT, Royal Decree 842/2002), any new electrical installation, extension, or major alteration must be carried out by an authorized electrical installer. Once the installation is complete and tested, the contractor issues an official Electrical Installation Certificate (Certificado de Instalación Eléctrica or CIE), confirming that the work meets all relevant safety codes.
Depending on the system’s total power demand and layout, technical regulation ITC-BT-04 specifies whether the project requires a Technical Design Specification (Memoria Técnica de Diseño) or a full engineering project. For a domestic garden building, consult your electrician about regional documentation requirements before breaking ground. If you have questions about the planning status of the structure itself, read our guide on regulations for installing a wooden house in Spain.
What you can do yourself: You can handle the physical groundwork—digging the trench, laying the protective conduit, and mapping out switch and socket positions. However, connecting to the main distribution board, pulling conductors, wiring the subpanel, and certifying the installation must be done by a licensed professional.
If you plan to use your space as a garden office or gym, planning your electrical layout and insulation together from day one saves time and money. Our thermally treated timber sheds arrive fully insulated and engineered for year-round use.
Direct from the manufacturer with over 20 years of experience and a 5-year warranty.
The installation starts by running a dedicated feed cable from your home’s main consumer unit out to the shed. Depending on your garden layout and the distance involved, you can either surface-mount the cable along an exterior wall or bury it underground.
The cleanest, most practical approach is to terminate this feed into a small garage consumer unit (subpanel) inside the shed. Equipping this board with its own miniature circuit breakers (MCBs) and a 30 mA residual current device (RCD) ensures that if a tool or appliance trips a circuit in the shed, it will not cut power to the main house.
For buried runs, ITC-BT-07 of the REBT specifies a minimum burial depth (measured to the base of the trench) of 0.60 m under garden beds or pedestrian paths, and 0.80 m under driveways or areas with vehicle access. Even in a private garden with no vehicle traffic, 0.60 m remains the standard safety benchmark. A code-compliant trench assembly requires:
The single most common DIY error is burying standard indoor twin-and-earth or flexible extension leads directly in the soil. Ground moisture quickly degrades non-rated sheathing, and an accidental strike with a spade or garden fork can cause serious injury.
Surface mounting along a boundary wall or solid fence is often the fastest, most budget-friendly route when the shed sits close to the main house. All exposed outdoor cabling must be UV-stabilized and protected in rigid outdoor-rated conduit. Ensure the wall penetration into the shed is sealed thoroughly using an IP-rated external gland or waterproof sealant.
The required conductor size depends on the total cable run and your anticipated electrical demand. Under ITC-BT-19, the maximum permitted voltage drop is 3% for lighting circuits and 5% for general power circuits. Using the standard formula from the REBT Technical Guide, $Delta U = frac{2 cdot L cdot I}{gamma cdot S}$ (with copper conductivity $gamma = 44text{ m}/(Omegacdottext{mm}^2)$ at 90 °C), here is how a 25-meter run performs under a continuous 16 A load (approx. 3.7 kW):
| Cable Cross-Section | Voltage Drop | Percentage of 230 V Supply |
|---|---|---|
| 2.5 mm² | 7.3 V | 3.2% |
| 4.0 mm² | 4.5 V | 2.0% |
| 6.0 mm² | 3.0 V | 1.3% |
At 2.5 mm², the voltage drop along the run alone exceeds the 3% limit for lighting. Because cumulative voltage drop is measured from the origin of the installation, any drop inside the main house supply counts toward this total as well. A certified electrician will calculate the exact cross-section required for your property. If you intend to run high-draw appliances—such as an air conditioner, an electric space heater, or a sauna stove—let your installer know beforehand, as these significantly affect cable sizing. For a closer look at heating demands, see our guide on sauna running costs in Spain.
For our 30 m² project, we installed 25 meters of 3 × 1.5 mm² cable for the lighting circuits, housed in brown surface-mounted mini-trunking to blend into the natural log walls. The three conductors provide live, neutral, and earth.
Cabling for the wall sconces was routed neatly along the upper perimeter of the walls, while feeds for the pendant lights were run along the exposed roof beams. Each fixture connects back to surface-mounted light switches using the same 1.5 mm² wiring.
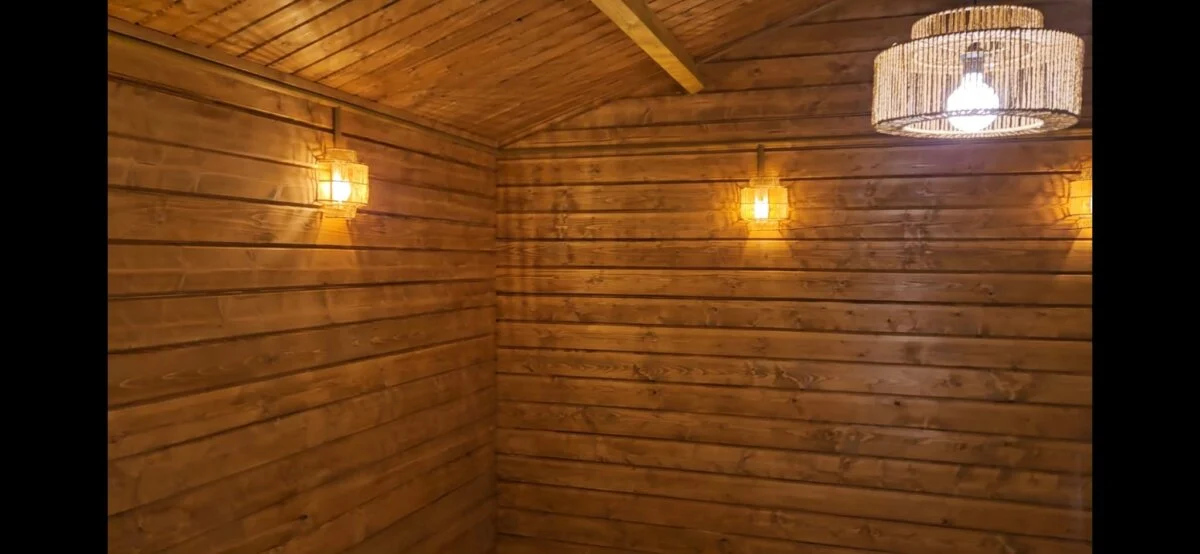
For context, residential standard ITC-BT-25 assigns lighting to a dedicated 10 A circuit using 1.5 mm² conductors, permitting up to 30 lighting points per circuit. With 6 wall lights and 2 ceiling pendants, this layout sits well within safety thresholds.
When selecting fixtures, keep in mind that exposed timber is combustible. While ITC-BT-49 primarily addresses electrical fittings on furniture, its requirement that luminaires mounted on flammable substrates carry the “F” mark (or be explicitly certified for direct mounting on combustible surfaces) is a sensible guideline for timber buildings. For aesthetic inspiration, take a look at our tips on decorating a small wooden cabin.
To provide 12 plug points throughout the room, we fitted six surface-mounted double sockets. This circuit used 25 meters of 3 × 2.5 mm² cable, run through matching brown mini-trunking along the top of the skirting boards, with each double box wired in series.
Always keep your socket outlets on an entirely separate circuit from your lighting. That way, if a kettle, heater, or power tool overloads a socket and trips the breaker, you won’t be plunged into darkness. Under ITC-BT-25, a standard 16 A general power circuit requires 2.5 mm² conductors and supports up to 20 outlets, meaning 12 points leave plenty of spare capacity.
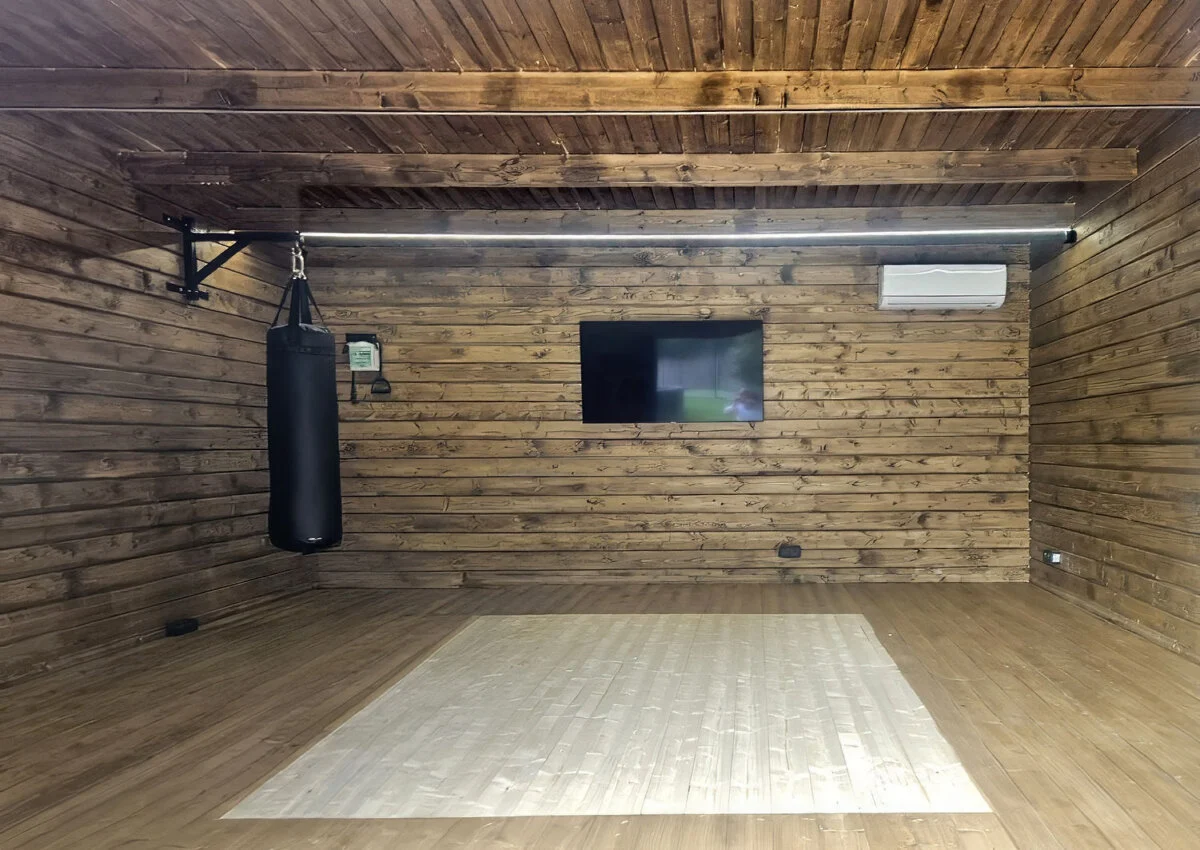
If you plan to install external sockets on an adjoining deck, veranda, or porch, treat them as damp locations. ITC-BT-30 specifies watertight conduit and weather-resistant fittings rated to at least IPX4 for exposed outdoor spots. In all cases, every socket circuit must be protected by a dedicated 30 mA RCD.
Surface-mounted wiring inside color-matched trunking is the cleanest, fastest, and most cost-effective method for electrifying a solid timber outbuilding. All materials for this build—cables, trunking, surface boxes, sockets, switches, six wall fixtures, and two pendant lights—were sourced from Leroy Merlin for under €500 total. A licensed electrician completed the interior routing, consumer unit connections, and testing in a single working day.
Note that this figure covers interior components for one specific project. The overall cost will vary depending on the distance from your house, the trenching required, and whether your main board requires an upgraded feed. Ask your electrician to quote ground preparation and supply cabling separately from interior second-fix work.
Before your installer signs off on the job, run through these final checks:
A spacious garden shed gives you ample space for multiple circuits, dedicated workstation power, and climate control. Our 70 mm wall-thickness models feature double-glazed joinery and fully customizable layouts.
Free delivery and a 5-year warranty directly from the manufacturer.
Electrifying an outbuilding is straightforward when planned systematically: size the supply cable correctly for voltage drop, fit an independent subpanel with local RCD protection, isolate lighting and socket circuits, and ensure the work is signed off by a certified installer.
You can carry out the preliminary groundwork—such as digging the trench, laying empty conduit, and fixing surface boxes to the walls. However, electrical regulations (REBT) require that final terminations, consumer unit connections, and commissioning be performed by a certified electrical installer who issues an official certificate (CIE). Uncertified work can invalidate home insurance policies and complicate future property sales.
For our 30 m² demonstration shed, the interior components (wiring, trunking, six double sockets, switches, and eight light fixtures) came to under €500, plus one day of professional electrical labor. Ground trenching, protective conduit, and the main supply cable from the house vary depending on distance and site conditions.
At minimum, the shed’s subpanel should include individual miniature circuit breakers (MCBs)—typically 10 A for lighting and 16 A for general sockets—alongside a 30 mA residual current device (RCD). This arrangement provides reliable protection against overloads, short circuits, and earth leakage hazards.